Sunday, September 14, 2014

It's Jammin' Time: Ground Cherry Honey Jam

I finally had enough ground cherries to make some jam this year. Usually, between Kevin and the boys (and occasionally me too), they all are eaten long before I have enough of the little gems to do anything with them. We have eaten quite a few this year, but we planted several plants, and they actually survived the onslaught of all the deer and groundhog problems - so I got to make jam for the first time ever! I remember my grandmother making this, and it was sooo good.


I used the same recipe I did earlier this year when I made a small batch of blueberry jam. I just substituted an equal amount (1 quart) of ground cherries for the blueberries and used honey instead of sugar. I ended up with five 4-ounce jelly jars of deliciousness that will be hidden out of sight from the boys  :)

Ground Cherry Honey Jam

1 quart ground cherries
2/3 cup honey (8 ounces)
1-1/2 tablespoons lemon juice

Pour the ground cherries into a low, wide, nonreactive pan and mash. Add the honey and lemon juice; stir to combine. Let the mixture sit until the honey begins to dissolve.

Place the pan on the stove and bring to a boil. Cook, stirring constantly, for 10 to 12 minutes, or until the jam starts to thicken.


When the jam has thickened, ladle into clean, hot jars. Seal with rings and lids. Process in a boiling water canner for 10 minutes.

Yield:  Approximately five 4-ounce jars


Saturday, September 13, 2014

Canning 101: Pork and Beans

I've always wanted to try a homemade pork and beans recipe to can, and I found several on Pinterest. Kevin and the boys love baked beans, complete with tons of bacon on top, so I thought it made sense to try and make my own version to have on hand whenever the need for a quick side dish arose.

This recipe was found on sbcanning.com, and there are tons of delicious canning recipes there that are on my to-do list for someday. I had leftover sauce from today's canning session (I doubled the recipe for canning), so I got more beans ready to eat for supper tonight as well. I do think I'll cut back just a little bit on the amount of vinegar next time, but I'll wait to see how everything tastes straight from the jar in a few weeks before I decide for sure. The recipe claims to be a clone for one of the Bush's baked bean recipes, and so far, I think it's pretty close.


Cloned Bush's Maple Baked Beans

1 pound navy beans, rinsed and picked over
1/2 cup chopped onion
2 Tablespoons brown sugar
1/2 cup molasses
1-1/2 teaspoon mustard powder
1 teaspoon salt
1 teaspoon black pepper
2 cups ketchup (I used Heinz but homemade would be great too)
1 cup pure maple syrup
2 cups water
1/2 cup vinegar, either cider or white (I used cider)
Salt pork, cubed in 1-inch pieces (one piece per canning jar)

Add dry beans to a Dutch oven and add 8 cups of water to cover the beans. Cook on high until the beans come to a boil, for about 2 minutes, and turn off the heat. Cover and let the beans sit in the pot covered for 30 to 45 minutes. The beans will soak up quite a bit of the water during this time.

Drain the beans and add 8 cups of fresh water to the pot along with the chopped onion. Cook the beans and onions for 15 minutes at a full boil.

In another saucepan, combine the brown sugar, molasses, mustard powder, salt, black pepper, ketchup, maple syrup, water, and vinegar. Cook to get a slow boil. It will be sweet but not thick.

Prepare 6 pint jars. Fill each pint jar with 1 cup of the bean/onion mixture. Add 1 piece of salt pork. Add more beans until the jar is about 3/4 full. Ladle hot sauce over the beans, leaving 1-inch headspace. Seal.

Pressure can pints for 75 minutes at 10 pounds of pressure.

Yield:  Approximately 6 pints

I did double the recipe and ended up with 9 pints. I used navy beans that were small, so I'm sure if you use a larger white bean, the yield will be higher.

Friday, September 5, 2014

Canning 101: Salsa

I can't believe how many weeks have passed since I last posted--sorry! I have been working hard in the canning kitchen and garden, plus my parents had their 50th wedding anniversary, had an auction AND moved the last part of August ----so, I've been a bit busy :) I promise I'll catch you up on all the goodies I've been putting up on the shelves in future posts.

Today, though, it was time to tackle a few more tomatoes, and salsa was the name of the game today. When I first made salsa, I went to the store and bought the Mrs. Wages salsa mix. It wasn't bad, so I did that for a few years. Then our oldest son Cody decided he wanted to grow hot peppers, so he and I came up with a salsa recipe of our own a few years back. I still follow the base recipe, but (of course) I tweak it here and there depending on what peppers I have available and the flavor of the tomatoes. This year we grew San Marzano tomatoes (a Roma-style tomato that I absolutely love), jalapeno peppers, Anaheim chili peppers, habanero peppers, and some sort of miniature bell pepper plant that I picked up on sale at the grocery store. What the deer didn't eat (can you believe they LOVED eating my Anaheim peppers?), I managed to salvage for a batch of salsa.

Keep in mind this is a base recipe. Cody and I actually did measure the ingredients that first year we made this, but I always adjust peppers and seasonings to taste each time. This recipe will give you a good base for you to tweak to your family's liking.

Cody's Salsa

12 pints paste tomatoes, skinned, cored, and chopped
1-1/2 pints finely chopped onions
3 green bell peppers, seeded and finely chopped
6 jalapeno peppers, seeded and finely chopped
4 to 5 garlic cloves, finely chopped
Handful fresh cilantro, roughly chopped
1/2 pint cider vinegar
1/2 cup brown sugar (optional)
1 to 2 cans tomato paste (will depend how thick you like your salsa)
3 to 4 teaspoons salt (to taste)
*Optional hot peppers (if you like): Anaheim, habanero, cayenne, etc.

Combine all ingredients in a large, nonreactive saucepot. Cook until desired consistency.


Ladle into hot, sterilized pint canning jars. Seal. Process in a boiling water bath canner for 15 minutes.


Monday, August 11, 2014

Canning 101: 2 Peach Jams and Blueberry Honey Jam

I bought 2 lugs of Colorado peaches at the grocery store yesterday....boy were they nice! I also picked up 2 pints of nice-looking blueberries and thought as long as I was in the mood to make peach jam, I could easily make a small batch of blueberry jam to go with.


All in all, I canned 17 quarts of peaches, 6 half-pints of peach jam, 5 half-pints of spiced peach jam, and 3 half-pints of blueberry honey jam (one of which never made it to the shelves!)


I found a nice recipe for Blueberry Honey Jam on http://www.100daysofrealfood.com/2014/06/26/blueberry-jam-honey-sweetened/. I like this recipe because it's a small-batch recipe, and I didn't have to spend a lot of time working on it. The recipe also works for most berries and fruit, with the exception of apples, and I also followed this recipe for one of the peach jams I made today. They both turned out delicious!

Blueberry Honey Jam

INGREDIENTS
  • 1 quart blueberries (approximately 1½ pounds)
  • ⅔ cup honey (8 ounces)
  • ½ lemon, juiced
INSTRUCTIONS
  1. Pour the berries into a low, wide, non-reactive pan and mash.
  2. Add the honey and lemon juice and stir to combine. Let the mixture sit until the honey begins to dissolve.
  3. Place the pan on the stove and bring to a boil. Cook, stirring regularly, for 10 to 12 minutes, until the jam thickens.
  4. To make the jam shelf stable, pour it into clean, hot jars. Apply lids and rings and process in a boiling water bath canner for ten minutes.
  5. When time is up, remove jars from the canner and place them on a folded kitchen towel and let them cool.
  6. When the jars are room temperature, check the seals. If the lids have gone concave and don't wiggle at all, they are sealed.
  7. Any unsealed jars should be refrigerated and used within a few weeks.
  8. If you don't want to process the jam, just pour it into a jar, let it cool, and put it in the refrigerator.


For my peach jam recipe, I basically used the Blueberry Honey Jam recipe, although I did use sugar instead of honey.

For the spiced peach jam, I had a few peaches leftover from the first box, so I added a few spices that I normally add to a peach pie. I think it turned out delicious!


Spiced Peach Jam

Approximately 2 quarts diced peaches
1-1/4 cup sugar
1 teaspoon good vanilla
1/4 teaspoon ground cinnamon
1/8 teaspoon freshly ground nutmeg

Place diced peaches in a heavy-bottomed saucepan and mash with a potato masher. Add remaining ingredients. Heat to a boil, stirring frequently. Cook at a rolling boil for approximately 10 minutes, or until the jam thickens.


Ladle into hot half-pint jars. Seal. Process in a boiling-water canner for 15 minutes.

Yield:  5 half-pints


Friday, August 8, 2014

Canning 101: Spiced Pickled Cabbage

We planted 12 heads of cabbage this year, and, of course, after the fact I discovered we didn't need to make sauerkraut as we had plenty left from last year. So, what's a person to do with 12 large heads of cabbage? I made a batch of canned coleslaw already (see previous blog post for recipe), and we fried some up a few times for supper. We did ask a daughter if she and her girls wanted some sauerkraut, so some of the heads went for that, but I still had a couple of cabbage with no obvious purpose.

Then I found a recipe for Spiced Pickled Cabbage in Favorite Pickles & Relishes:  Storey's Country Wisdom Bulletin A-91 by Andrea Chesman.  I found this on my Scribd subscription, and they have so many different bulletins available. If you want to figure out how to do anything, they've probably got a bulletin for it!

It's an easy recipe to do, and I can't wait to taste it!


Spiced Pickled Cabbage

4 quarts shredded red or green cabbage
1/2 cup pickling salt
1 quart white vinegar
1-1/2 cups sugar
1 tablespoon mustard seeds
4 teaspoons grated horseradish
1 teaspoon whole cloves
4 cinnamon sticks

Layer cabbage and salt in a large kettle or crock. Let stand overnight.

The next day, drain the cabbage, pressing out all juice. Rinse thoroughly and drain again.

In a saucepan, combine vinegar, sugar, mustard seeds, and horseradish. Bring to a boil. Tie cloves and cinnamon in a cheesecloth spice bag and add to the saucepan. Simmer 15 minutes.

Pack cabbage into clean, hot pint jars and fill with vinegar mixture, leaving 1/2-inch headspace. Remove air bubbles by running a nonmetallic spatula down sides of the jars. Seal and process in a boiling-water bath canner for 20 minutes.

Yield:  4 pints


Canning 101: Fresh Tomato Soup

It's been a slow tomato season this year. First it was too wet this spring, and this summer really hasn't been warm enough to ripen the tomatoes. They love heat, and we just haven't had it here in eastern Iowa. We finally had our first BLTs the other night, and today I had enough tomatoes to can something. I usually can whole tomatoes first, but as we grew celery this year (and it was ready to use), I decided to start off tomato season by making tomato soup.

I first got the recipe years ago from my chiropractor. We'd had a bumper tomato crop, and she shared her favorite tomato soup recipe with us. It was a hit, and I've been making it ever since. I've posted the recipe below, but I do tweak it a bit. I've been making it for years now, and I've always used the same heavy-duty stockpot, so any more I really just eyeball the vegetable amounts. I know how full the pot has to be to get so many pints of soup, but to start out, it will be easier for you to follow the recipe. You can adjust ingredients after you go through it the first time to see how many onions or how much celery your family likes in the soup. I usually end up with triple the amount of vegetables. I use 1 stick of butter and add enough chopped onions and celery to completely cover the bottom of my stockpot. Then I fill the rest of the pot up with diced tomatoes and end up with approximately 21 pints of soup. Again, once you try the recipe, you can adjust the vegetable amounts to your liking.


Fresh Tomato Soup

3 onions, diced
1/2 bunch celery, diced
5 quarts diced tomatoes, peeled and cored
1 stick butter (not margarine)
3-4 Tablespoons flour

In a large stockpot, melt butter. Add diced onions and celery. Saute vegetables on medium-low heat until the celery and onions are soft but not brown, approximately 15 minutes.


Add 3-4 Tablespoons flour (add just enough to soak up any liquid in the pan...you just want to bind together all the vegetables). Cook for approximately 5-10 minutes over medium-low heat. This will give the butter/flour mixture a slightly nutty flavor.

Add your diced tomatoes. Simmer for approximately 20 minutes, stirring occasionally.


When the tomatoes have released their juice and it resembles soup (as opposed to simply chopped vegetables), you are ready to can the soup.


Ladle hot soup into hot jars. Add lids and seal.

Process in a boiling water bath for 30 minutes (for pints) or 35 minutes (for quarts).

Yield:  Approximately 4 quarts.

Tuesday, July 29, 2014

Canning 101: Dilly Dog Relish and Zucchini Pineapple

I just love summer and canning season! There are so many new recipes out there to try, along with my family's tried-and-true recipes, but this post is about two new recipes I've tried this summer. We have tons of cucumbers and will have tons of zucchini, as do most gardeners, so perhaps these two recipes will help you out with your abundance of both.

First up is Dilly Dog Relish. I found this recipe in the e-book The Pickled Pantry:  From Apples to Zucchini, 150 Recipes for Pickles, Relishes, Chutneys & More by Andrea Chesman. I got my copy through my Scribd subscription, but it's also available through Amazon. It's definitely well worth a read-through, especially if you're a crazy canner like me who is looking for a few new and different recipes to try. I did vary from Andrea's recipe by adding a red bell pepper - never said I followed a recipe exactly!

Dilly Dog Relish

6 cups finely chopped cucumbers (about 12 pickling cucumbers)
2 onions, finely chopped
1 sweet red bell pepper, finely chopped
1/4 cup pickling salt
3 cups white vinegar (5% acidity)
1 cup water
1 cup sugar
6 sprigs fresh dill, chopped (about 1/4 cup)
1 head garlic, cloves separated, peeled, and chopped (I used 9 garlic cloves--adjust to your family's taste)
1 teaspoon mustard seeds
1/2 teaspoon freshly ground black pepper

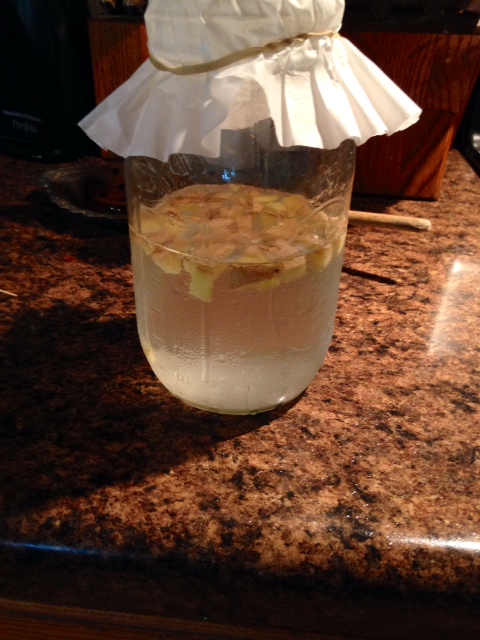
Combine the cucumbers, onion, and bell peppers in a large bowl or container. Sprinkle with the salt and cover with ice water. Let stand for at least 2 hours and up to 6 hours. Drain the vegetables in a colander, pressing out any liquid.


Combine the vinegar, water, sugar, dill, garlic, and mustard seeds in a saucepan and bring to a boil, stirring to dissolve the sugar. Add the drained vegetables and stir until well combined. Simmer until hot, about 5 minutes.

Pack the mixture into clean hot half-pint caning jars, leaving 1/2-inch headspace. Remove any air bubbles and seal.

Process in a boiling water bath for 10 minutes. Let cool undisturbed for 12 hours before storing in a cool, dry place.

Don't open for at least 6 weeks to allow the flavors to develop.

Yield:  Makes 8 to 9 half-pints


I love Pinterest. I've found a ton of canning recipes there, and I have a huge collection of recipes on my Pinterest site that I one day want to try, and today is was the day for Zucchini Pineapple. I found this yummy recipe on hickeryhollerfarm.blogspot.com, and it's definitely a keeper! I always have too much zucchini, and I get tired of simply shredding and freezing it for future use - it almost always becomes freezer burnt and tossed out because I just don't bake enough zucchini bread. But, I think this recipe will help me go through all that extra zucchini. My youngest son Travis just loves pineapple, so I can't wait to get his opinion on this recipe.


Zucchini Pineapple

4 quarts zucchini, peeled and either grated or diced (your choice)
1-1/2 cups bottled lemon juice
1 can (46 ounces) unsweetened pineapple juice
3 cups sugar

Remove the peel and seeds from zucchini. Coarsely grate or cube zucchini into smaller cubes.

Mix all ingredients thoroughly and simmer for 20 minutes, stirring frequently.

Fill clean hot jars with hot zucchini mixture, leaving 1-2/-inch headspace. Adjust lids.

Process in a boiling water bath for 15 minutes. Remove jars and allow to cool completely.

Yield:  6 pints

Note:  Only use pints and half-pint jars for this recipe. Anything larger and the mixture will be too dense to can correctly. This recipe originated from the Missouri State University Extension Service.

Thursday, July 24, 2014

Canning 101: Dill Pickles and Carrots

What a day it was today!  I knew I had cucumbers to deal with, as we'd picked a bunch last night and I had lots leftover after I made mustard pickles last night, but I definitely had my hands full today! While I was busy making another round of mustard pickles and dill pickles, Kevin dug the rest of our carrots, so that was the next item on the agenda for the day.

I really hope these mustard pickles turn out.  It's a new recipe for us this year, but I've tasted the liquid going on the cucumbers, and it's definitely a tasty one.....so hurry up time so I can taste these pickles! I did another 9 pints of them today.  Seven of them went in the water bath canner, and the remaining two pints are in the fridge just waiting for time to pass so I can sample :)

The main pickle of the day, though, were dill pickles. I've always used Kevin's grandmother's recipe to make dill pickles. It's definitely an old-timey recipe - complete with a grape leaf in each quart jar, but they are so worth it. It really is a kosher dill pickle recipe, and the boys (and Kevin) just won't be happy if I don't make a bunch of these every summer. Depending on the size of your cucumbers, you can do them whole, sliced up into spears, or even make slices, which are really good on a hamburger.


Gram Worrell's Dill Pickles

4 quarts pickles, dill sized
3 quarts water
1 pint cider vinegar
3/4 cup canning salt
1/2 teaspoon alum

Put a washed grape leaf in the bottom of each quart jar. Add a head of dill, a clove of peeled garlic, a piece of hot pepper (optional), and a small onion (or piece of onion) into each quart jar.

Pack pickles in jars.

Mix all ingredients, except the cucumbers, and heat until just boiling. Pour into jars over cucumbers and seal.

Process in a water bath canner for approximately 10-15 minutes. Keep the temperature just below boiling, or your pickles will shrivel up.

Yield:  Approximately 6-7 quarts


As I had a huge tub of freshly dug carrots at my disposal today, what better way to preserve them but to can them? It's been years since we've had a decent crop of carrots. Usually the moles or shrews get to them before we dig them in the fall, so we got the jump on the critters this year, and I had a beautiful crop of carrots to can today.

How to Can Carrots

Trim and scrape carrots.  Slice or cut as desired.

Paw raw into sterilized jars (pint or quart jars per your preference). Cover with boiling water. Add salt (1 teaspoon per quart or 1/2 teaspoon per pint jar). Seal.


Process carrots in a pressure canner for 30 minutes at 10 pounds of pressure (for quarts) or 25 minutes at 10 pounds of pressure (for pints).


Wednesday, July 23, 2014

Canning 101: Coleslaw and Mustard Pickles

I love coleslaw. Any recipe, any variety. Whether it's a mayo-based slaw or freezer slaw, if it's on the menu, I'm in.

We planted 12 cabbage plants this spring with the idea that we needed to make sauerkraut this year. Unfortunately after taking an inventory of all the jars on the canning shelves, we did NOT need to make any. So, what to do with 12 cabbage heads??  Why make coleslaw, of course!

I've done freezer coleslaw in the past, but freezer space is a bit tight right now, so I was on the hunt for what to do with cabbage that can be processed by canning. I came across a recipe for canned coleslaw, and that got me thinking. What exactly is coleslaw anyway? Really, in a canning sense, it's pickled cabbage. You add cabbage and any other vegetables and mix with a vinegar brine/syrup/solution, and so the idea for canned coleslaw was born.

While I was quite liberal with the amounts of veggies used in my slaw, I didn't mess with the proportions of vinegar in the syrup portion of the recipe. That's what preserves the veggies and is necessary to make sure things don't spoil. Feel free to double/triple the syrup solution (I did) to make sure you have enough to cover all the veggies you put into jars.


Canned Coleslaw

1 medium head cabbage
1 large carrot
1 red bell pepper
1 small onion
1 teaspoon salt

Syrup:
1 cup white vinegar
1/4 cup water
2 cups sugar
1 teaspoon celery seeds
1 teaspoon mustard seeds

Shred together the vegetables. Add the salt. Mix well. Let stand 1 hour.

Drain water from the vegetables. If preferred, can rinse and drain veggies.

Boil syrup ingredients together for 1 minute. Keep warm.

Pack veggies into hot pint jars and fill jars with hot syrup liquid. Add lids and seal.


Process jars in boiling water bath for 15 minutes. Remove from canner and let stand for 12 hours before moving.

Yield:  Approximately 7 pints


We've been checking the cucumber patch daily and have picked a few here and there to make salads, but there just haven't been enough to do anything with. Until day that is. So, while I didn't have my usual dill and grape leaves ready to go for my traditional dill pickles, I did come across a recipe for mustard pickles that I'd been dying to try.


Seeing as we had a few (sarcasm here!) cucumbers that were larger than I like to use in my dill pickle recipe, I thought I'd chunk up a few and try them in the mustard pickle recipe.  I found the recipe on Scribd. They have a ton of booklets from A Storey Country Wisdom Bulletin, and this recipe if from their Favorite Pickles and Relishes booklet.


Quick Mustard Pickles

1-1/2 cups white vinegar
1 cup water
1 cup sugar
1/2 cup prepared mustard
2 teaspoons pickling salt
1 teaspoon prepared horseradish (I used homemade horseradish relish..recipe in a future blog!)
8 cups cucumbers, sliced or cut in 1/2-inch chunks

In a large saucepan, combine all but cucumbers and bring to a boil. Pack cucumbers into hot, sterilized pint jars. Add boiling liquid, leaving 1/2-inch headspace. Seal. Process in a boiling water bath for 10 minutes.

Yield:  4 pints

Wednesday, July 16, 2014

Buffalo Chicken and Pasta Bake

I got my Wildtree Blazin' Buffalo Blend yesterday, and, of course, I had to come up with a recipe to try it in. I had chicken. I had rotini pasta. I had cheese. A casserole was born!

This was really super simple to make, and it was delicious. Both Travis and Kevin loved it and said I could make it again. The recipe is actually formulated from the dip recipe that is on the side label of the blend bottle, but I just changed it up to make a sauce for my casserole.


Buffalo Chicken and Pasta Bake

1 package chicken tenders, cubed or shredded (your choice), cooked
8 ounces cream cheese, softened
2 cups shredded Colby Jack cheese, divided
1/4 cup Parmesan Romano cheese
2 Tablespoons Wildtree Blazin' Buffalo Blend
1/4 to 1/2 cup milk (enough to make a creamy sauce)
1 16-ounce package rotini pasta

Cook pasta according to package directions. While the pasta is cooking, combine 1 cup of the shredded cheese (reserving 1 cup) with all other ingredients. Add milk to the mixture until it reaches a sauce/soup consistency.

Drain the pasta when al dente and combine pasta with the sauce ingredients.

Place mixture into a greased 9 x 13" casserole dish. Bake at 350 for approximately 20 minutes. Top the casserole with the reserved 1 cup of shredded cheese and bake for an additional 10 minutes, or until the cheese is nice and melted.

Yield:  Approximately 6-8 servings

Canniing 101: Sweet Onion Relish....AKA Rosemary Onion Confit

I've spent the winter and spring looking at all kinds of canning, pickling, and preserving cookbooks, posts on Pinterest, and various canning websites looking for new recipes to try out. I've pretty much got the basics down of what we like to eat, but sometimes it gets boring and predictable. I like to cook, and I love trying new recipes for just about anything. When Kevin told me the onions in the garden just weren't going to keep as we'd like (too much water all spring), while he started pulling the onions, I went in search of a recipe to use onions in.

I came across Pickles & Relishes:  From Apples to Zucchini by Andrea Chapman on my Scribd subscription. If you don't subscribe to Scribd, you can find her book here on Amazon  I've found quite a few recipes in her book that I want to try out, especially the 1-jar pickle recipes, just in case a recipe turns out to be one we don't care for, but after trying this Rosemary Onion Confit, I have a feeling all the recipes in her book are going to be great.

I did make a few modifications to her recipe, as I usually do, but I did not change the vinegar amount. That is what will be preserving the onions, so I didn't mess with it. I wasn't sure as it was cooking if it would be something my family would like or not, but once everything pulled together and I was ladling it into jars, I took a taste, and man was it good! Here's the recipe, with my modifications:


Sweet Onion Relish

1/4 cup extra-virgin olive oil
3 pounds onions, chopped
1 cup cider vinegar, or wine vinegar (I used apple cider vinegar...5% acidity)
3/4 cup sugar
1 large sprig fresh rosemary
1/2 tablespoon soy sauce (Andrea's recipe called for 1 tablespoon or to taste)
Freshly ground black pepper (a few turns on the grinder...to taste)

Heat the olive oil in a large saucepan over medium-high heat. Add the onions. Decrease the heat to low and stir to coat the onions with the oil. Cook, stirring occasionally, until the onions are translucent and soft, about 30 minutes.


Stir in the cider vinegar, sugar, rosemary, soy sauce, and pepper. Simmer for another 5 minutes.


Pack the onion mixture into clean, hot half-pint jars, leaving 1/2-inch headspace. Remove any air bubbles and seal.

Process in a boiling water bath for 10 minutes.

Let the jars stand undisturbed for 12 hours. Do not open for at least 6 weeks to allow the flavors to develop.

Yield:  Approximately 4 half-pints

Note:  I tasted the relish after I ladled it into the jars, and what was left in the bottom of the pan was awesome. I can't wait for 6 weeks to pass so I can have some with a grilled steak!

Saturday, July 12, 2014

French Dressing and Fermentation

No, I didn't ferment a French dressing recipe, but I did a couple of fermentation experiments plus made French dressing for supper today :)

I've been fascinated with the whole fermentation process and have been reading up on various different things to make, from kimchi to wine to natural sodas. So, while I wait for my cabbage to be ready so I can try to make kimchi, I decided to experiment with  making a ginger bug for homemade ginger ale and also a couple different kinds of homemade wine. Cheap wine. Nothing fancy in this household  lol.

The recipe for the ginger bug I found on wellnessmama.com through Pinterest, of course! I love the idea of making homemade sodas, and if it is fermented, it will be a natural probiotic as well..win-win in my book!


Making the ginger bug was really easy, and for the instructions on how to make, click on the link above to wellnessmama.com. Lots of good recipes on that site.

While I plan to someday get all the necessary equipment needed to make a good homemade wine, I thought I'd try my hand at some cheap wine made from items I had on hand already:  Plastic milk jugs, concentrated fruit juices (no preservatives), and ordinary yeast. I will get wine yeast in the future (if this turns out halfway decent), but the recipes I read said it can be done with ordinary bread yeast. Time will tell! The first just was made using regular grape juice concentrate, and the second jug was made using a cherry pomegranate juice concentrate. I love fruit wines, so I'm really hoping this last one turns out tasty :) For the recipe, I again found one on Pinterest from allrecipes.com, and I pretty much followed it, although I did make a few modifications from other recipes I'd found online. I'll let you know how it all turns out!


For the French dressing, I have a favorite I've made for a long time, and Martha Stewart's website has the same recipe. It's really easy to make, and it sure beats any French dressing you can buy from the store.


French Dressing

  • 1/4 cup white-wine vinegar
  • 1/4 cup ketchup
  • 1 tablespoon sugar
  • 2 teaspoons paprika
  • 1 teaspoon Worcestershire sauce
  • Coarse salt
  • 1/3 cup olive oil

In a small bowl, whisk together vinegar, ketchup, sugar, paprika, and Worcestershire; season with salt. Whisking constantly, add oil in a steady stream until incorporated.

Makes about 3/4 cup

Wednesday, July 9, 2014

I Won Good Things To Eat June Contest!!

I've never really entered contests, but I stumbled across Good Things to Eat in June, and I thought why not enter? I love sharing recipes anyway, so it really was fun for me. I entered the recipes I've shared here on the blog.....so imagine my surprise when I checked my emails on July 1st and discovered that I had won their June contest!!


My packages arrived yesterday....and what a treat! Cookware, mixing bowls, stockpots, bamboo utensils, reusable produce bags, and 5 huge cookbooks, two of which that had been on my cookbook wish list for a long time! I think Kevin and Travis had as much fun as I did opening up the boxes to see what was inside.


The cookware, stockpots, and utensils are all from Natural Home, a company I frankly had never heard of before, but I will definitely be trying everything out and letting you know in future blog postings how it all works. The pots are stainless steel, and the mixing bowls and utensils are all from bamboo/pressed bamboo. I love it that everything is "green"....and the fact the pots and pans stack to take up less space is fantastic!


I apologize for the blurred quality of these pictures.....I guess I was a bit excited at the thought of all these goodies! I'll definitely also be making recipes from each of these books.....I had fun starting to read through them last night, and I can see lots of new things coming from my kitchen very, very soon!

Monday, July 7, 2014

Cajun Whole Wheat Bread

I hope everyone had a terrific 4th of July weekend. Ours was a good one. The kids were all here, and we enjoyed the visit and the food....always good food when the kids are all here :)

I did manage to get 11 pints of diced beets canned to go along with my pickled beets, and there are a few more smaller beets still growing in the garden. If they get any size to them at all, they'll probably end up as more diced beets (unless I can sneak a few to make more pickled beets for me!).

Kevin pulled the pea vines as they were dying back, so I got a few quart bags of those put in the freezer. One patch of onions really had been too wet this year and were starting to rot on the outsides, so we pulled those and diced them up for the freezer. I really prefer to dry onions to keep for the winter, but once an onion starts to "cook" in the garden, it just won't keep.....so at least they're ready to use and in the freezer for later use.

Since the pea vines were dying back, we just had to dig a couple hills to find some new potatoes.....can't go without at least one dinner having creamed new potatoes and peas. And we managed 2 meals with it...pure heaven! Now we just have to leave the rest of the potatoes alone so they can grow, which is really, really hard when fresh potatoes taste that darn good!

I'm going to be on the lookout for green beans to can later on......I thought they'd come out of the pounding they got after the last round of storms, but on closer inspection today, the deer have completely destroyed them. I do have a few pole bean seeds that I can plant, and it's not too late yet (but close!). Cross your fingers that I'll have some kind of bean to can later on this summer.....we're completely out on the shelves, and we love home-canned green beans.

I did manage to bake a new bread recipe this weekend. It was actually cool this weekend, so we put a pot of chili on in the crock pot, and I wanted to try Cajun Whole Wheat Bread (in my bread machine). I thought it was tasty, although a bit spicy, and Kevin said it would make a really good sandwich bread for a spicy burger with cheese....maybe someday down the road we'll have some left to try his idea :)


Cajun Whole Wheat Bread

Ingredients for 1-1/2-Pound Loaf Size:
1/2 cup chopped onion
1/3 cup chopped green pepper
4 teaspoons Wildtree Roasted Garlic Grapeseed Oil
1-1/2 teaspoons Wildtree Cajun Seasoning
1 cup milk
2 Tablespoons honey or mild-flavored molasses
2 cups whole wheat flour
1 cup bread flour
1 Tablespoon gluten flour
1 teaspoon active dry yeast or bread machine yeast

Ingredients for 2-Pound Loaf Size
1/2 cup chopped onion
1/2 cup chopped green pepper
2 Tablespoons Wildtree Roasted Garlic Grapeseed Oil
2 teaspoons Wildtree Cajun Seasoning
1-1/3 cups milk
3 Tablespoons honey or mild-flavored molasses
2-2/3 cups whole wheat flour
1-1/3 cups bread flour
2 Tablespoons gluten flour
1-1/4 teaspoons active dry yeast or bread machine yeast

Instructions:

In a small saucepan, cook the onion and the green pepper in the Roasted Garlic Grapeseed Oil until the onion is tender. Cool mixture slightly.

Combine all dry ingredients in a bowl (except the yeast) and stir to combine.

Add all wet ingredients to your bread machine pan, including the onion and pepper mixture. Add the dry ingredients. Make a small "well" in the center of the dry ingredients and add your yeast.

On your machine, select the loaf size. If available, select the whole grain cycle or select basic white bread cycle.


Thursday, July 3, 2014

Canning 101: Pickled Beets

I've been watching the beets growing, slowly by my book, in the garden and have been waiting and waiting for them to be big enough to do something with. We've had a few beets here and there already, but there haven't been enough ready at the same time to do anything with. Until today.

I picked an overflowing dishpan full of dark red beets today....finally! My family enjoys them best simply canned and then cooked with a little bit of butter. While that's all well and good, I love pickled beets. I think Kevin will eat them, but the boys merely sniff at them. They like traditional dill pickles and will usually pass on any other kind.

So I drug out my trusty Ball Blue Canning Book and found a recipe for pickled beets. While I've canned beets before, I've never had enough extra beets to make any pickles until this year. Before I started, though, I called Mom. Mom is the queen of pickled beets. She makes them. I eat them. I never needed to make any for myself, so I figured it was about time I did. I am sure glad I called her and quizzed about the recipe before I did anything, though. Hers is not the same as what is in the Ball book. I'm sure their recipe is fine and dandy, but if I was going to go through the work, I wanted them to taste like Mom's. Come to find out, she's been using my Grandma Wilson's pickled beet recipe all these years! Double treat for me today!!

Here's my Mom's (and Grandma's) pickled beet recipe:

Pickled Beets

This recipe uses approximately 3 quarts fresh beets (about 24 small). Make sure you scrub the heck out of the beets (you'll see why later in the recipe). You must leave at least 2 inches of the tops on plus leave the root on. This will help to keep the color in the beet and not so much in your water.


Place beets in a large stockpot and cover with water. Cook until the beets are tender when pierced with a fork (mine took about half an hour). Drain beets and reserve the cooking water as you'll use a little of this in the brine.

Trim the tops and roots and peel the beets.

In another large stockpot, combine 2 cups of the beet cooking liquid, 2 cups white vinegar, 2 cups sugar, and 2 cinnamon sticks (optional). Bring to a simmer and stir until sugar is dissolved. Add the beets to this brine mixture. You can leave the beets whole if they're small, but I usually cut them into quarters or bite-sized pieces. When everything is nice and hot, pack beets and brine into hot pint jars, leaving 1/4-inch head space. Remove any air bubbles. Adjust caps.

Process pints in boiling water bath for 30 minutes.

Yield:  Approximately 5-6 pints depending on the size and quantity of beets

Wednesday, July 2, 2014

Sour Cream Black Raspberry Cheese Pie

While this blog was mainly the desire to chart the progress of our garden and canning adventures, it really hasn't gotten to canning season for me yet. Most of our veggies and fruits have gone into the freezer so far, with a little jam made along the way.

So far this summer I've frozen spinach, kale (lots of kale!), broccoli, a few peas, and raspberries. I've been freezing the wild black raspberries until I have enough to make a few batches of jam, but today I was hungry for pie. I knew the raspberries were just about ready to be picked again, so I set off for the timber to see what I would find. Kevin and I picked enough black raspberries for another 2 freezer quart bags of berries, and I had enough leftover to make a Sour Cream Raspberry Cheese Pie.

I didn't want to heat up the kitchen today, so this recipe fit the ticket. Creamy, cheesecake-like texture that was no-bake with fresh raspberries on top.


Sour Cream Black Raspberry Cheese Pie

1 graham cracker crust
1 8-ounce package cream cheese, softened
1 cup sour cream
1/4 cup sugar
1 teaspoon good vanilla extract
Fresh black raspberries, about 3 cups

In a mixing bowl, whisk the softened cream cheese and sour cream together until smooth. Add in the sugar and vanilla extract. Mix until well combined.

Pour into graham cracker crust and top with black raspberries. Refrigerate for at least 2 hours before serving (overnight would be better....if you can wait that long!).


Camping and the 4th of July

Lucky for us the 4th of July falls on a Friday this year. I think everyone in my neck of the woods is more than ready for a long weekend, especially after the horrid storms we've had in eastern Iowa this past week.

With the longish weekend coming up, what better time to browse through some of my favorite camping recipes and put together another tasty collection. We traditionally have camped over the holiday weekend, and everything is cooked over a fire. I'm not so sure we'll be getting away this weekend with all the yard cleanup/garden work and canning I've yet to do, but we'll most likely light the campfire in the yard and maybe the grill for a few tasty treats.

When we're camping, my Dutch oven is my main go-to piece of equipment. Most suppers are cooked in it, low and slow, so that we can do fun activities as a family like fishing or games while supper is cooking over the fire. One-pot meals are the best while camping, and everything always tastes better when cooked over coals.

The first recipe is a ribs recipe found at Everyday Dutch Oven. When we first started seriously camping when the boys were smaller, I found this site on the Internet, and I've used several recipes from here. This is a good one:

Bacon Wrapped BBQ Country Ribs

  • 5 pork country ribs
  • 10 slices uncooked bacon
  • 1-1/2 cups barbecue sauce
  • Toothpicks

Lightly oil or spray dutch oven. Cover bottom of dutch oven with half of barbecue sauce.
Wrap each rib with two slices of bacon; secure bacon with toothpicks. Place ribs in single layer in dutch oven. Spoon remaining sauce evenly over ribs. Ribs should not be swimming in sauce.
Bake at 350 degrees for one hour or until bacon is crisp on top and ribs are tender. Recipe can easily be doubled and baked in larger dutch oven.


The next recipe that is a must-have while camping is a really easy coleslaw recipe. I've made this recipe for years, having seen it first in some small recipe booklet that you can pick up in the check-out aisle at the grocery store. The Girl Who Ate Everything also has this recipe......it's one that is worth trying, especially if you have picky eaters who "don't like slaw"...money says they'll like this one!


I don't know about you, but it's just not a camping trip without baked beans. The kind that cook all day. The kind you would fight your children to get that last spoonful (just kidding boys!). I think I've found that baked bean recipe, and although it's written to be made in a crock pot, it works just fine slow cooking over an open fire in a Dutch oven.


There has to be dessert while camping, and while s'mores usually will make their way to the menu sometime during a camping trip and other times I'll find myself making the usual "dump cake" with whatever pie filling I have on hand, sometimes a warm fruit crumble is just what I'm craving. This recipe uses plums, but peaches, rhubarb...just about any fruit can be substituted.


I can't forget a breakfast recipe.....that's actually my favorite time to cook while camping. I get up early, stoke the fire and get my coffee boiling on the fire before everyone else is awake. Sometimes we do pancakes on the griddle, almost always we have bacon and eggs (the smell is to die for over the fire in the morning air), but every now and then I like to change it up and make something fun. Again I have to thank Everyday Dutch Oven for this recipe.....as I said earlier, when we first started to camp with the boys, this website full of recipes was exactly what we needed, and the recipes are so good we still use them. Enjoy!


Saturday, June 21, 2014

Roasted Beet and Kale Salad...and Late Night Single-Serve Chocolate Cake

We picked the first few beets today, and aside from the usual canned beets and pickled beets that I plan to make, I wanted to try roasting a few of the beets. I've never tried them roasted and had been looking forward to it if we had extra...and we do. :)

Adding to the fun of cooking, this past week we had a wind/electrical storm that took out the electronic motherboard on my kitchen stove.....so as we await the arrival of a replacement board, we are minus a stove. The burners still work (gas stove), but no oven. So...roasting these beets would mean using my microwave.

Four years ago when we remodeled our kitchen, I bought a Sharp Carousel Convention microwave. The intent of this purchase was that I would use the microwave to bake, roast, etc., during the summer so as not to heat up the kitchen when it was so hot. Of course, convention would take hold, and I'd use the oven and heat up the house. But with no oven available, it was time to test out this convection microwave.

I trimmed the beets and scrubbed them as usual. Then I found a glass pie pan and placed the beets in it along with about 2 Tablespoons of water. I microwaved the beets at 350 degrees F for approximately 10 minutes until they tested soft when pierced with a knife. I let them them cool until I was able to peel them and proceeded with the roasted beet and kale salad recipe.


Roasted Beet and Kale Salad

6 medium-sized beets, trimmed and roasted
Approximately 2 cups kale, washed and trimmed
1 Tablespoon honey mustard
2 Tablespoons honey
1/4 cup apple cider vinegar
1 cup extra-virgin olive oil
Salt and pepper, to taste

Combine roasted beets and kale in a medium bowl. Set aside.

Combine apple cider vinegar, honey mustard, honey, and olive oil in a small bowl. Whisk until combined. Add salt and pepper to taste. Adjust flavors if needed.

Pour dressing over beets and kale and stir to coat vegetables completely. Refrigerate for at least 2 hours to let flavors meld together.


After dinner, the boys decided to go fishing, and Kevin and I sat down to watch a movie. As is usually the case, my sweet tooth went into overdrive. I searched through my Pinterest recipes and came across a single-serve microwavable chocolate cake recipe. I've never baked a cake in a microwave before, but as the oven was out of commission, I decided to give it a whirl. Wouldn't you know....as soon as I'd pulled out my cake from the microwave, the boys returned home from fishing! And I had 2 more cakes to make  lol.....but they were definitely worth it. I found the recipe on www.chocolatecoveredkatie.com


One-Minute Chocolate Cake

1 Tablespoon plus 2 teaspoons cocoa powder
3 Tablespoons all-purpose flour
1/8 teaspoon salt
2 teaspoons sugar
1/4 teaspoon baking powder
1 stevia packet (or 1 Tablespoon more sugar)
2-3 teaspoons coconut oil or vegetable oil
3 Tablespoons milk
1/2 teaspoon pure vanilla

Combine dry ingredients and mix very, very well. Add liquid; stir. Transfer to a little disk, ramekin, or coffee mug. Microwave 35-40 seconds (center will be soft like a lava cake center). If you don't want to eat your cake straight from the cup, be sure to spray your dish first (and then cool before trying to remove it).  Edit:  If you want a more cake-like texture, microwave each cake for 1 minute.


Friday, June 20, 2014

Ranch BLT Pasta Salad

As it's picnic and soon-to-be-reunion time in my family, I thought I'd share another Wildtree salad recipe that would make a delicious addition to any reunion table. And if your reunions are anything like mine, there won't be a bite left afterwards to eat!


Ranch BLT Pasta Salad


1 cup light mayo
1 tablespoons Dijon mustard
1 pound pasta, prepared according to package directions
8 strips bacon, cooked and crumbled
1 avocado, diced
2 cups arugula
1 pint cherry tomatoes, halved


In a mixing bowl combine the Ranch Dressing Mix, mayo, and Dijon mustard. Set aside. In a large bowl combine all other ingredients. Add the Ranch Dressing mixture to the rest of the salad and fold in until everything is evenly coated. Serve cold.


Thursday, June 19, 2014

Hickory Smoked Pulled Pork Sandwiches

One of the first recipes I bookmarked on the Wildtree recipe page was Hickory Smoked Pulled Pork Sandwiches. My family goes nuts over pulled pork, so this will be one of the first recipes I try as soon as my kit arrives this week. This just screams summer picnic!


Hickory Smoked Pulled Pork Sandwiches


Ingredients

1 teaspoon salt
1 teaspoon paprika
½ teaspoon chili powder
½ teaspoon black pepper
½ teaspoon granulated garlic
3 pounds pork roast
¼ cup water
2 tablespoons light mayo
12 ounce bag coleslaw mix
8 buns

Combine salt, paprika, chili powder, black pepper, and granulated garlic. Rub mixture over entire pork roast. Heat 1 tablespoon Hickory Smoked Grapeseed Oil in a nonstick skillet over medium high heat. Add the roast and sear on all sides. Transfer roast to a slow cooker. Whisk together Cactus Pete’s Agave Barbeque Sauce and water; add to the slow cooker. Cook the roast on low for 6-8 hours or high for 4-6 hours. Pork should be very tender and shred easily. While the pork is cooking, prepare the slaw. Whisk together the Fresh & Easy Coleslaw Dressing and mayo. Add the coleslaw mix and toss to coat in the dressing. Refrigerate until you are ready to serve. Once the pork is finished cooking, shred using 2 forks. Toss the pork in the liquid from the slow cooker; keep warm. Heat remaining 1 tablespoon Hickory Smoked Grapeseed Oil in a nonstick skillet over medium heat. Add the red onion and mushrooms and sauté until tender and golden, about 20 minutes. Serve shredded pork on buns with sautéed mushrooms and onions and prepared coleslaw. 

Serves 8.